One of the biggest challenges of deer hunting is processing the animals that you take. But there’s no getting around it: processing is an essential part of the deer hunting experience. You must process the deer in a timely and efficient manner to keep the meat safe, stopping it from spoiling. Let’s learn more about processing a deer, including how to process a deer, step-by-step.
Most hunters will leave deer processing to “experts.” That is, they bring their deer to professional processors. But if you want to, you can process your deer by yourself at home. It can be challenging for first-timers, but once you get used to it, you can start doing it on the regular.
Here’s our guide to properly processing your venison before putting it in the freezer.
Methods of Processing Deer
There are a few methods that you can use to process a deer, but they all follow the same basic principles:
- remove the hide
- Gut the deer
- take out the meat (Quarter the deer)
- keep the meat cool
- package it for the freezer
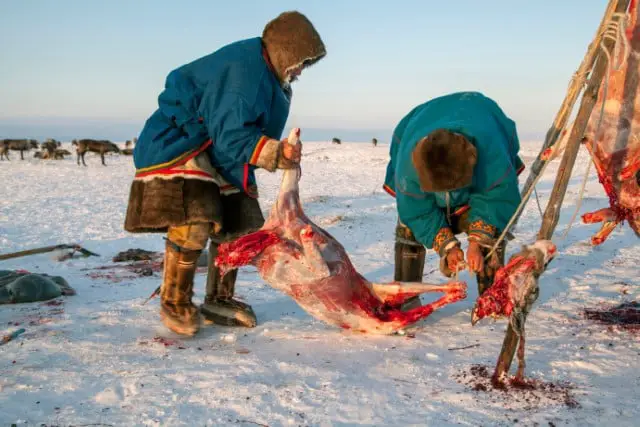
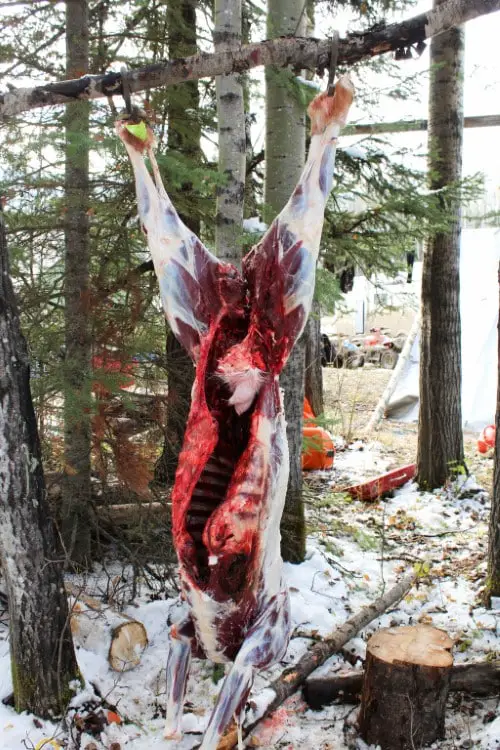
Dragging or carrying the animal is usually impossible when you hunt a deer. It’s too large and heavy. Hunters go through the first stages of processing while still in the field, after they’ve killed the animal. This is called field dressing.
The easiest processing method is to field dress and quarter the animal and then take it to an animal processor. A professional processor helps you process the meat in cuts as you instruct them.
If you’d like, you can avoid the expense of a processor and do the processing yourself. Let’s learn about this below.
Field Dress the Deer First
If you’re a deer hunter, you must know how to field dress your deer. Whether or not you’re planning on bringing your deer to a processor, you must do the field dressing first.
There are certain tools you need for field dressing. These include:
- Knife
- Knife sharpener or extra blades
- Gloves
- Gambrel, rope, and pulleys
- Bone saw
- Contractor garbage bags
- Ice
- Ice cooler
Field Dressing: The Basic Steps
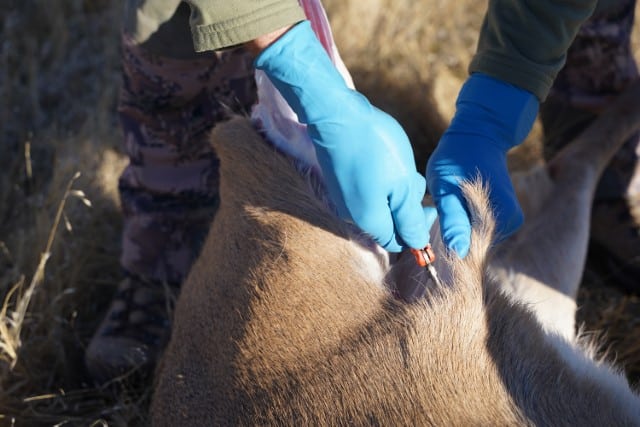
Have a sharp knife for field dressing and a short blade to ensure the best cutting control. You’ll want to wear latex gloves to keep your hands free of dirt.
Your main objective during field dressing is to take out every organ without damaging them, particularly the bladder and stomach. Be careful and patient as you do this.
You should only need a few precise cuts to take out the insides. The guts are linked to the body through two locations: the anus and the windpipe.
You can easily lift everything out if you break the connections. Remember to always cut off the skin from the inside out.
This will mean it’s less likely for loose hair to stick to your meat. It also helps protect the organs from puncture.
If the weather is warm, you should store the chest cavity in a meat cooler with ice.
Are you planning on bringing your deer to a processor? Bring the field-dressed animal to that processor right away.
If you have enough time and the right facilities to process the deer at home, take a look at the steps we’ve set out in the next section.
How to Do the Rest of the Processing at Home
If you’re prepared to take on the task of processing your deer, you can follow this step-by-step deer processing guide.
Once you have your deer and you’ve field-dressed it, you can start the steps we have set out below.
Step 1: Aging the Deer
You must keep your field-dressed deer carcass cool at all times. It may go bad if you don’t.
We field dress deer because taking out the organs creates essential cooling of the meat. But you still have to keep it at a low temperature.
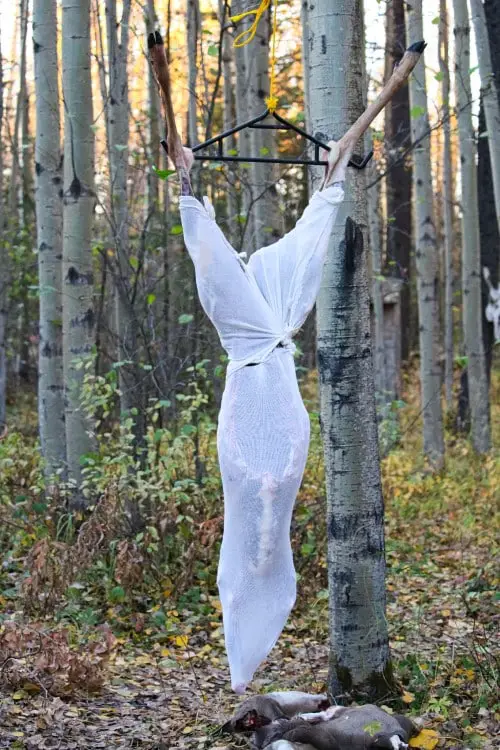
The most crucial factor is keeping the carcass at 32 to 42° Fahrenheit.
Age the meat as it stays cool. You should do this for a minimum of 24 hours before processing.
If you start processing before 24 hours have passed you might end up with tough venison. That is because rigor mortis lasts for 24 hours.
Aging is the process in which the natural enzymes present in the meat break down the muscle collagen. The muscle collagen is the reason why deer meat is tough.
As deer get older, they produce more collagen and become stronger.
The animal should be aged between 32 and 42 ° Fahrenheit before you skin the deer. This lets the natural enzymes in the deer dissolve collagen while the rot-causing bacteria remain in a state of dormancy.
It’s best to keep your deer cool in a walk-in cooler. If you don’t have this kind of facility, however, you can age your deer by keeping it cool using ice.
A young deer should be aged for at least two days. An older deer, on the other hand, should be aged between five and seven days.
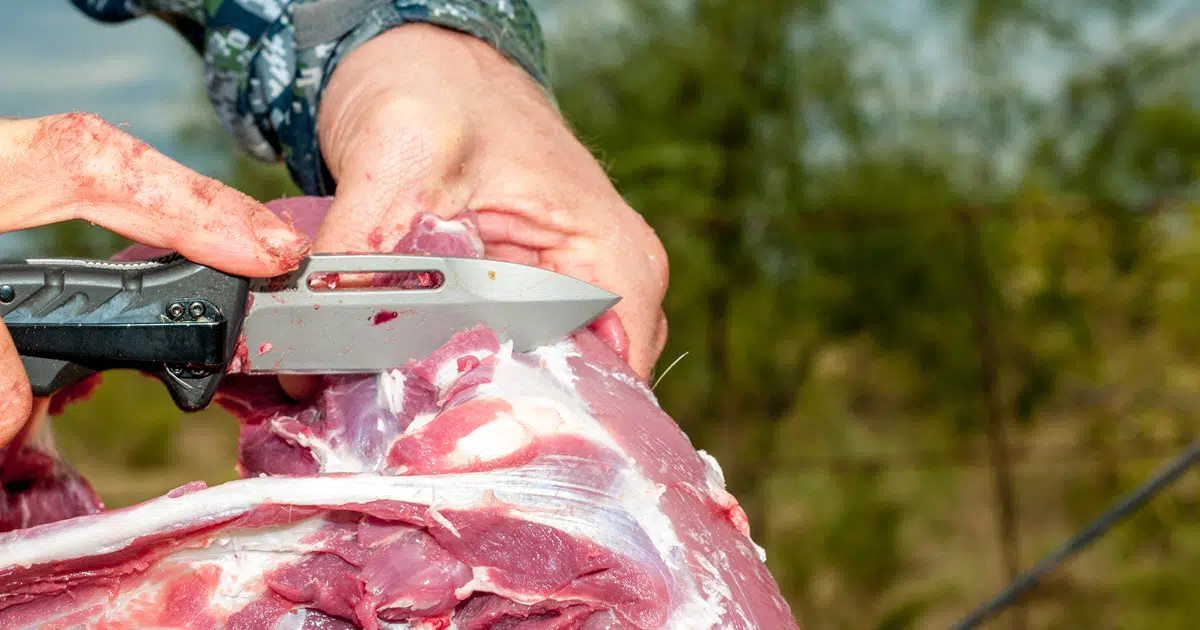
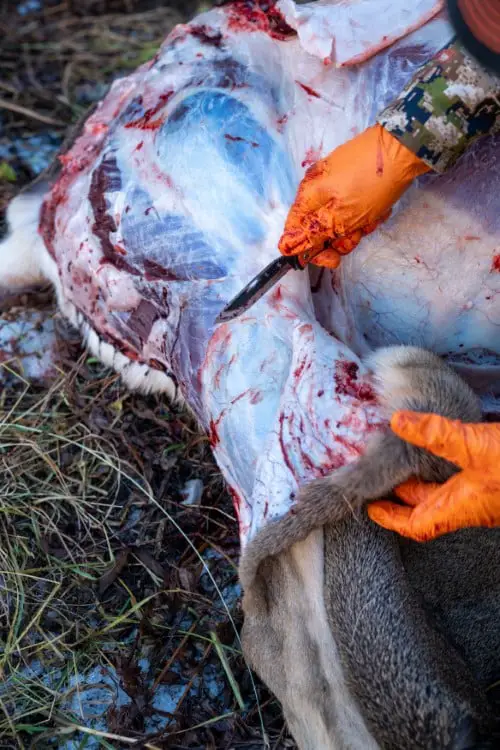
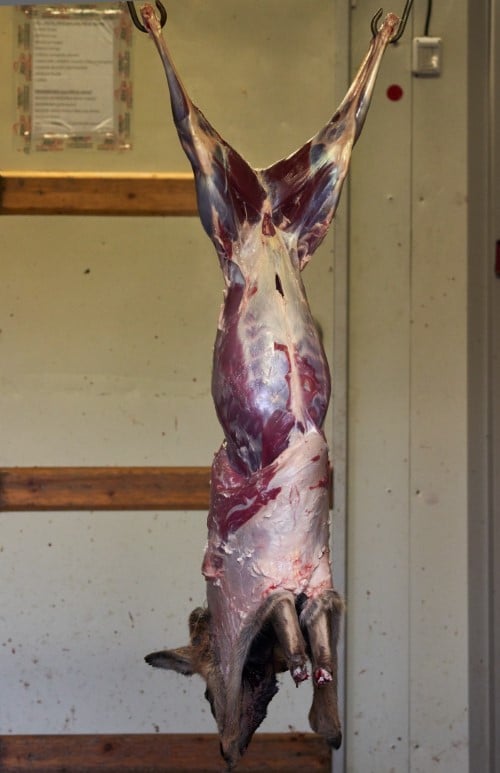
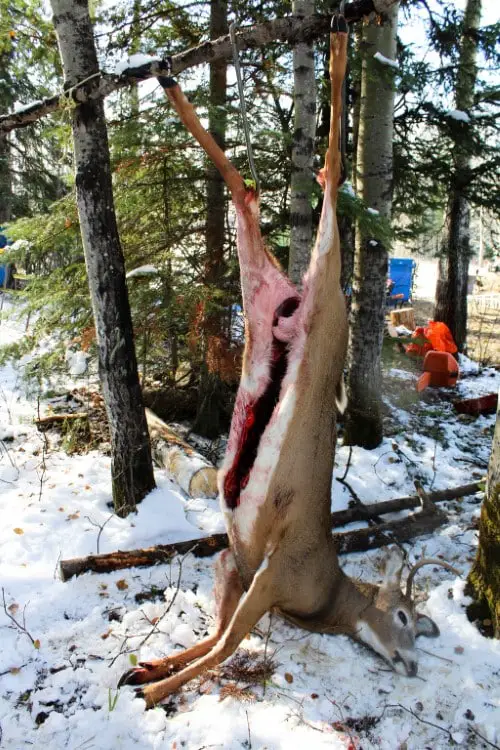
Step 2: Skinning the Deer
Once you’re ready to start skinning the deer, start by lifting the animal using a gambrel or placing it on the table. If you don’t have a table for this, you can process the deer on the ground.
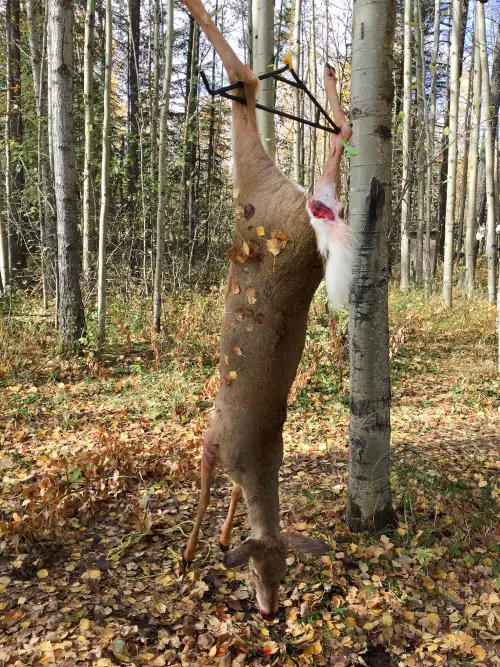
Lower the carcass until the hams are at eye-level while the head remains in contact with the ground. This helps to keep the animal from swinging around while you work.
Start from the groin area, and then slide your knife’s point underneath the skin. Cut a long slit from the lower part of the ham past the knee.
Repeat with the opposite side. Don’t worry about the hair that gets on the meat during skinning.
You can wash the meat and then wipe it dry after boning it out (and before cutting it).
Remove the skin from both knees, and slice around the joint. Next, remove the skin off of the back legs. Then, peel it all the way down to the tail.
Next, cut off the tailbone and continue peeling to the front shoulder, using your knife to loosen the skin when necessary. Then, cut off the front legs around the knee.
Sharp lopping shears are best to do this.
Beginning at the chest’s opening, slide your knife through the skin, and cut a long slit on both sides of the leg until the point where it is severed.
Peel off the skin from the legs and slide it across the shoulders, and then all the way to the neck’s bottom using your knife to cut as needed.
Cut through the neck’s meat by using a knife and then cut the spine with the aid of a saw.
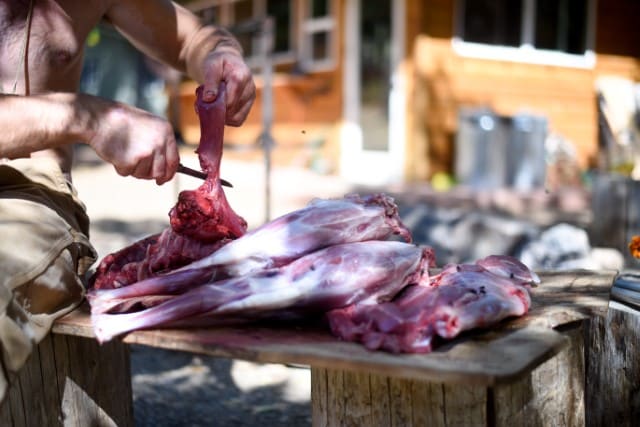
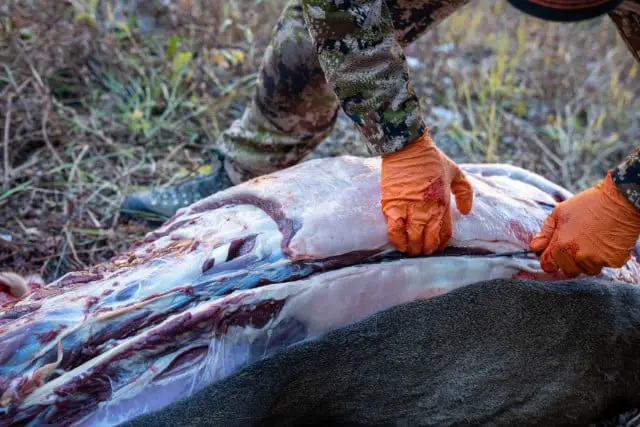
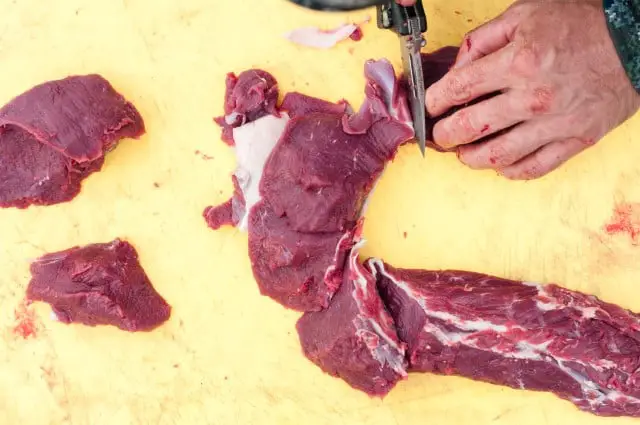
Step 3: Boning the Deer
Make sure you have two clean, large buckets or pans. One of them is for meat. You can label that one as “Good.” This will hold the larger, tougher, and more sinewy pieces that can be used for burgers and sausage, as well as stew meat, jerky, and pot roast.
You can label the second large bucket or pan as “Best.” You’ll put the higher-quality, leaner cuts and tender meat in this bucket or pan. This meat is best for delicious dry roasts, steaks, and kabobs.
Separate the front legs. Once you’ve done that, take the shank, pull it away from the body, and begin cutting between the legs and the rib cage.
Continue cutting the leg and eventually the connecting shoulders and rear. If you use a razor-sharp knife, you’ll be amazed at how little the front leg is attached to the rest of the body.
Repeat the same process for the opposite side. Once both legs are disconnected, set them to the side.
Separating the Meat
Take the neck meat, brisket, and flank, and toss them into the Good pan. Since these will be the leftovers of meats, it’s less crucial to cut them off in one neat piece. Hack it as far as possible.
After that, you must remove the backstraps. Each one should be cut into two long slits that extend from the rump down to the base of the neck—one slit tightly along the backbone and the other tightly along the upper ribs.
Create a horizontal cut across the two slits to the neck’s base, and then lift the backstrap, cutting through the bone below with a knife, attempting to collect the most meat you can. Put this meat into the Best pan.
Remove the shank meat from each hind leg to add it to the Good pan. In the remainder of the hindquarter, natural silverskin seams connect large muscles.
You can separate these muscles as best as possible by putting wet fingers along the seams.
After that, just cut off the muscles of the bone, resulting in clear, seamless chunks of meat. Place all of it in the Best pan.
Slice the shank meat off the front legs and throw it into the Good pan. The upper portion of the front shoulder contains relatively sinew-free meat that can be used to cook roasts or even steaks.
But it’s not the best cuts of steak or roast. Throw this, along with any edible meat left in the carcass, into the Good pan, and then use the best portion for jerky and stew meat.
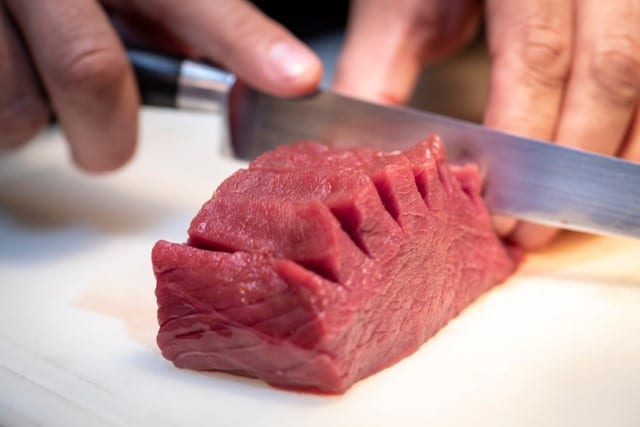
Step 4: Trimming the Meat
Take the Good pan and your sharpest knife, then grab any piece of meat you want to examine and trim. Here’s a tip; it’s O.K. to include some silverskin and tiny amounts of fat in the final cut of sausage or burger.
However, it would help if you had minimal to no fat in your stew meat and jerky. If the meat you’re holding is easily cut into a tiny piece of lean, clean meat, trim it, and place it in a pile separated for stew or jerky.
If you’re not able to cut the fat in the best way you can, don’t overthink about the silverskin and just put it in a pile for burgers and sausage.
Take the Best pan, and cut the remaining fat from each piece of meat.
If you will store the venison in the freezer for more than six months, keep the silverskin and cut it later since it helps prevent the meat from freezing burn. If not, remove it now.
Cutting the backstrap and portions of the hindquarter to steaks will limit how you can cook the meat in the future.
That is why you should cut the backstraps in 10 to 12 inches long sections. Leave the muscles and the muscle groups of the hindquarter in one piece and then freeze it in that particular condition.
Then, in the future, when you choose to take the package out for cooking, you can make 1/4-inch-thick cutlets, 5-inch-thick fillets, 1-inch-thick steaks, or dry roasts.
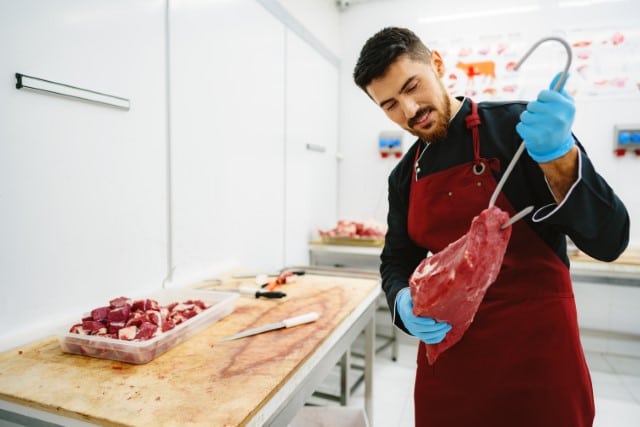
Step 5: Packaging and Storing the Meat
Now that the meat has been cut and trimmed, you must adequately package it before storing it. If the packaging is done right, the venison stays delicious for a year at most.
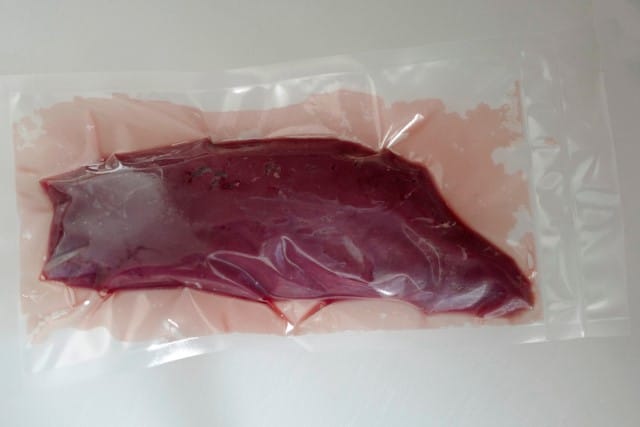
Air is the biggest reason why meat can go bad or end up with freezer burn if improperly packaged. You can use grade plastic wrap or freezer paper to tightly wrap the meat so that no air remains between the meat and paper.
You can also use a vacuum sealer to wrap the meat. After doing so, you can use butcher paper to cover the package again and then add a label indicating the cut.
Put the meat in a freezer.
Deer Processing Tips
Here are a few tips to help you during deer processing:
1. Use a Sharp Knife
You should always try to use a sharp knife to process a deer. Another pro tip is to always keep a blade sharpener with you, even on the hunt. A sharp knife is essential for the skinning process.
2. Accurate Knife Technique
Caution is essential when using a sharp knife. While using the knife, always be aware that it’s best to make short and precise cuts away from your hands or your helper’s hands.
Also, always keep the knife handle clean. This cuts down on the risk of the knife slipping and cutting your hand.
3. Wear Gloves
Gloves can significantly aid your cleaning process, as they protect hands from getting dirty but most importantly, they prevent the spread of contaminants while you’re skinning and boning the meat.
It is imperative to keep hair from getting over the animal. Switching your gloves regularly when you skin the deer will help keep the hair off.
4. Develop a Buddy System
The addition of someone else’s hands and eyes can help in the cutting and skinning process. For one thing, they can help you balance the carcass.

Once you’re experienced with cutting and skinning, though, you should be able to do it by yourself.
Cost of Processing a Deer
Many hunters decide that processing deer at home is too difficult and time-consuming. In many cases, they lack the storage facilities for cooling the deer carcass.
If this is you, you’ll need to pay for professional processing.
The cost of professional deer processing can vary depending on which specific services the professor offers. It also varies by individual processor. Generally speaking, you can expect to pay a minimum of between $75 and $120.
It’s less expensive if you just pay for the basic services. However, if you’re looking for items like sausage and jerky, you’ll pay more to cover the additional work involved.
If you do a lot of hunting, you may decide it’s worth the investment to purchase the equipment you need to process deer at home.
Is It Worth Processing Your Own Deer?
As we touched on earlier, frequent deer hunters may decide that investing in the equipment they need to do processing at home is a better financial decision than paying a professional.
There are many reasons hunters decide to process deer themselves at home. Here are five good reasons to do the task on your own.
1. You Know You Have Your Own Deer
Although many processors try to ensure that each deer is tagged throughout the entire process, that necessarily does not always happen. If a lot of deer are killed simultaneously, the cuts may get tossed into a different pile, or more disturbingly, the whole deer can become swapped.
If you process your deer, then you’ll know for a fact that the deer you have stored in the freezer is actually yours. Here are some of the benefits of processing your own deer:
2. It’s Easier (Once You Get Used to It)
We know that at first glance, the idea of processing a deer can seem very intimidating but it’s not. Yes, it is a challenging task but not impossible.
Once you’ve learned the steps to how to process a deer, after practicing to do it once or twice, the experience will become not only easy but also enjoyable.
3. You Can Do Custom Final Cuts
Processors charge more money when you get unique cuts done, but if you do it yourself, you can cut the meat however you want. Do you want a neckbone roast?
You can prepare it. Are you thinking about bone-in chops to serve for a special dinner?
It’s not a problem if you’re cutting the deer yourself. Do you want more excellent stew than burgers? Or vice versa? Let it happen.
4. There is Less Wastage of Meat
Most of the time, large-scale processors aren’t able to spare the extra time to salvage each piece of meat that is left from your hard-earned prize. As a result, cuts like neck roast, rib meat, and shanks tend to get discarded in the name of cutting down on time. By making it yourself, you are able to use all of the deer.
5. You Have Packaging Control
You can package the meat as per your preference. For example, you can use a vacuum sealer to wrap it tightly or go by the traditional method to use freezer paper and tape. Whichever way you find it easier or more suitable, you can do so.
This comes in handy if you prefer vacuum-sealed meat, as most professional processors use the traditional method. There are many reasons to go to a professional processor, the lack of time or lack of space for butchering being two of the most common factors.
Common Mistakes Made When Processing a Deer
Processing a deer is an intense task that requires a lot of patience and precision. There is always room for error.
Here are the most common mistakes that hunters make during deer processing:
Mistake 1: Failing to keep the meat cold before processing
A warm deer carcass is an ideal environment for dangerous bacteria to grow and flourish.
After successfully hunting a deer, you must field-dress it and remove all the internal organs. This will lower the body temperature of the animal.
You must next immediately bring the animal home and set it on ice. This is true even if you intend to process the deer right away.
A common hunter mistake is failing to cool down the deer quickly enough. When this happens, the meat spoils and becomes unsafe to eat.
Mistake 2: Cutting the meat using an electric knife or handsaw
If you’re cutting around the joint of the leg and more tough cuts of meat, you might be tempted to pull out a large saw or electric knife to slice through the connective tissues and bones.
Don’t do this! It could cause bone marrow to be smashed in a manner that tarnishes the rest of your meat. It is recommended to use a sharp knife for cutting, even if it takes a bit longer to make your cuts.
Mistake 3: Leaving the fat on the meat cuts
Venison is different from beef in one major way. If you pick a beef steak from the market, a healthy fat marble is an excellent thing. However, this isn’t the case with venison.
Some hunters make the mistake of leaving on the fat and connective tissue. This ruins the taste of their venison.
The connective tissue and fat in deer meat do not taste good and won’t melt away to provide moisture as the meat is cooked.
How To Tell If The Meat is Bad
The meat that comes from a deer is called venison. This meat is incredibly lean and has a rich ruby red color, as well as a distinctive flavor.
Venison is available in various cuts, including ribs, sausages, shoulder roasts, and rump. This meat tastes great with sweet sauces, fruit, and bitter herbs such as rosemary and red wine.
Deer meat is a treat whether it’s hunted or bought from the store. When appropriately cooked without becoming dry, venison makes delicious, healthy food. It is ideal for cooking pies, casseroles, roasts, and barbeques.
Like all meats, venison gets degraded over time because of a variety of factors such as bacteria and heat. It is essential to know whether the venison you purchased or freshly processed is fresh or not.
Here are some telling signs to determine whether your venison is rotten.
Sign 1: Time Duration Between Killing and Storing
Venison begins to spoil from the moment the animal dies. That’s why you’ve got to do the field dressing and cool the meat as quickly as possible.
Letting the venison sit at a warm temperature, even room temperature, for a long time can spoil it. That’s because the protein and fats present in the venison begin to degrade.
Sign 2: Time Duration of Storing the Meat
Another major factor in the degradation of venison is the long time duration of refrigeration prior to eating or freezing.
You cannot keep venison in the refrigerator for more than three days. It must go in the freezer before then, or it isn’t safe to eat.
When the venison is in the refrigerator, you should keep it in the section with the lowest temperature. This is usually the lower shelf, towards the back.
Cover the venison with clear plastic or vacuum packing.
Sign 3: The Smell
Be sure to trust your senses to know when food is spoiled. If it has a bad smell then it most likely is spoiled.
Fresh venison has an intense gamey smell, but it’s not unpleasant.
Bad venison has a sewage-like smell. And in some cases, bad meat will smell even worse after cooking than it did beforehand.
Sign 4: The Color and Texture
Another way to tell the difference between good or bad venison is through flavor and texture.
Freshly cooked venison should be deep red. When you touch it, you should notice a silky smooth texture.
Venison that has gone bad is more of a brown shade, and it may even have a greenish tint. A shiny metallic sheen is also a sign of spoilage, and when you touch it to feel the texture, the meat is wet and slippery.
When it comes to ground venison, a brown color means the meat is spoiled. The mince should appear dark red throughout the entire package to signal its good.
Professional Processor vs DIY Deer Processing
Here is a comparison between processing a deer yourself and getting it professionally processed.
| Professional | Do-It-Yourself |
| It costs $70-$120 | It’s relatively cheaper, but you have to make an initial investment |
| High risk of ending up with meat from someone else’s deer rather than your own | You get your own deer that you worked hard to hunt |
| You get 30 to 35% yield | You get 45% yield |
| The fat content is up to 50%, adding more pounds than actual meat | You cut actual meat and remove the fat (the fat content should only be 20%) |
| Meat from areas like the neck, ribs, and shanks is wasted | You carefully and neatly cut the meat that is wasted at a processor’s shop |
| Getting special cuts like sausages costs more | You can make any unique cuts you want |
| Provides traditional butcher paper packaging | You can package as per requirement; paper wrap for meat that you’re going to use and vacuum sealer for ones that you’re going to store |
| Easy process | It can be challenging |
| Doesn’t require much effort | The task takes up a lot of your energy |
| Less messy | You have to clean up afterward |
| Doesn’t take up much of your time | It is a time-consuming task |
Final Thoughts: Processing a Deer At Home
Processing a deer at home can seem like an intimidating and burdensome task, but once you’ve learned the proper way and after doing it a couple of times, the very same task becomes enjoyable.
Processing the deer on your own also makes the hunting a delightful experience, when you cut the meat to your satisfaction after a long and hard-working hunting session.
Here you’ve learned about:
- Methods of deer processing
- Why field dressing is essential
- How to process a deer at home
- Deer processing tips
- Benefits of processing deer at home
- Common mistakes when processing a deer
- How to tell if deer meat is bad
- How DIY deer processing compares to professional processing
You now have the knowledge to make an informed decision on whether to process your deer at home or bring them to a professional processor. Be sure to make the decision that best fits your needs and preferences.


