Immediate field dressing is an essential part of deer hunting. It’s how to keep your venison safe and free of dangerous bacteria. But what about quartering a deer? If you don’t know how to quarter a deer, you will have a difficult time storing your meat.
Quartering a deer is exactly what it sounds like: cutting a deer carcass into quarters, or four large parts. As you quarter a deer, you should keep the legs and quarters attached.
Technically, when you are done with quartering, you will have five pieces total. The fifth piece is comprised of the ribs and spine, as well as the neck. Bring all these pieces to a meat processor so that you can enjoy your venison.
Below we’ll discuss why you’d want to quarter a deer and the tools and equipment you’ll need. After that, we will get into the step-by-step process of quartering a deer, including where to make the cuts.
Can You Quarter a Deer in the Field?
Yes, you can quarter your deer in the field immediately after field dressing.
Just make sure you have all the tools and equipment you need (we’ll talk about that later) and that you stop your venison from getting contaminated.
Why Would You Want to Quarter a Deer?
Quartering a deer makes the carcass much more manageable for transporting and storage. Many hunters will do the quartering immediately after completing field dressing.
Field dressing, of course, is the process of removing all the organs and entrails from the deer, as well as letting the blood drain. Quartering the deer makes the field dressing process more thorough.
Necessary Tools and Equipment for Quartering a Deer
In addition to your tool kit for field dressing your deer, make sure you have the full equipment for quartering. These include:
Knife
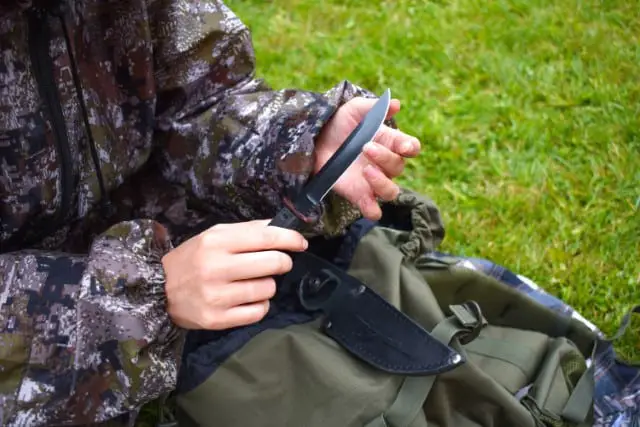
The best knife for quartering should be both sturdy and sharp. Make sure it’s a knife that has an excellent edge that keeps its quality over time.
You will need a top-quality knife for all aspects of field dressing and quartering your deer.
Most deer hunters recommend having at least two knives for the field dressing and quartering process. When it comes to skinning, you should use a blade that is specifically made for precision.
When it comes to quartering, however, you will need something much sturdier and heavy.
Find This on AmazonBone Saw (or Reciprocating Saw)
You’ll find it extremely helpful to have a bone saw or reciprocating saw at hand when quartering your deer.
A saw is especially important for detaching the pelvic bone and back legs, severing the spine, and removing the hooves.
Find This on AmazonGambrel
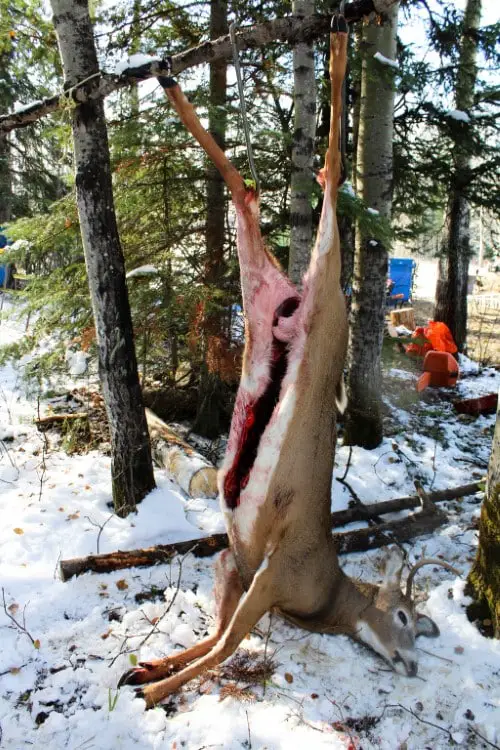
You need a gambrel so you can hang the deer carcass. This is extremely useful when it comes to quartering your deer carcass.
When you have a gambrel, you don’t have to worry about protecting your deer from dirt (and potentially dangerous bacteria) on the ground.
Find This on AmazonRubber Gloves
This one almost goes without saying. You will want to keep your hands protected while field dressing and quartering a deer. Have more than one pair of rubber gloves in your kit.
Find This on AmazonOther Important Items
You will also need a full field dressing equipment kit on hand. This includes the knives and rubber gloves we talked about earlier, as well as:
- Synthetic drop cloth or a garbage bag (contractor-sized)
- Game wags (lightweight and high-quality)
- Paracord
- Wet wipes
Quartering a Deer: Step-By-Step Process
You must fully field dress and skin your deer before you quarter it. Hang the deer (for example from a tree) and then start the process.
1. Targeting the knee joints, cut off the carcass’s front legs.
The knee joint is relatively large compared to the rest of the leg, so it’s easy to find.

Before making the cut, find the joint, specifically its center. You’ll need to use your fingers to do this.
Use your hands to create a twisting motion when you start cutting.
You may not need a saw if you do this the right way. Once you’re successful with this, you have removed the deer’s front legs.
2. Now it’s time to remove the carcass’s shoulders.
Once you have located the shoulder blades in the chest area, find the area just beneath them.
Then use your knife to cut that area, as you continue to lift up the front leg. You shouldn’t have to cut through any heavier bones when cutting in this area stretching from chest to front shoulder.
After this process, you should have removed the shoulders from your deer.
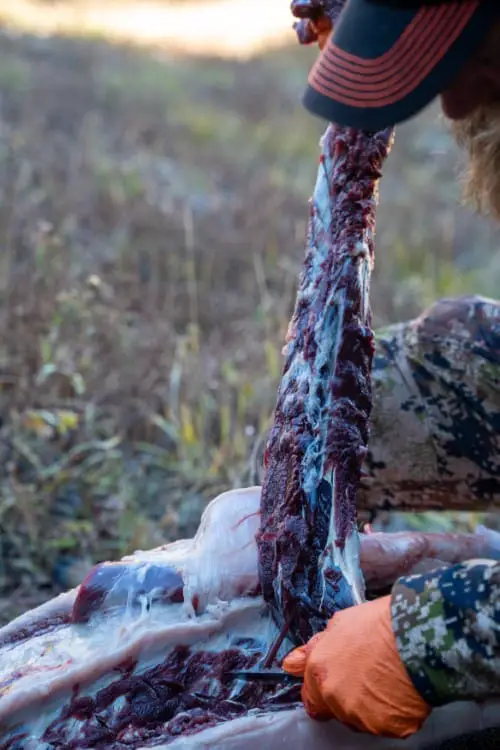
3. Look at the areas immediately beside the spine.
These are the places where the backstraps lie. You will need to cut these away with your knife.
You’ll also need to take out meat from the neck as you complete this step.

Find the deer’s vertebrae, and follow them as a guide as you cut starting at the carcass’s high hip area and following onwards through its neck area.
Once you’ve done this and have the neck meat, find the backstrap again. Use your hands to hold onto it immediately beneath the hip.
With this in hand, use your knife to cut a cross shape over the steak, reaching the flank muscle. Here’s some information on backstrap size, to help you find it.
In many adult deer, the backstrap may be slightly larger than an average soup can. Start pulling on the backstrap once you have hold of it.
Use your knife to detach it from the rib cage.
4. After you have taken off the backstraps.
Use your knife to detach the pair of interior tenderloins that are found inside the rib cage. Find them immediately beneath the hips, near the spine.
5. Make sure your knife is still sharp and get it cleaned off.
The next part of the deer you will cut through is especially thick. These are the deer’s hams.
It’s possible you will have to use a different knife if you can’t get your current one sharp enough.
Find the deer’s pelvis and use it to guide your cutting in this step. The deer’s hams pivot at its hips, using a joint with a ball-and-socket structure.
Once you have found this, ask a hunting companion to find the opposite side of the gambrel and for them to grab and hold it. Cut one side of the ham, and then switch sides to do the other.
6. Detach the back legs.
This step is a little more time-consuming than the others in how tricky it can be to locate the joint beneath the shank muscle or at the upper part of the knee.
Many hunters like to cut at the deer’s knee joint. Before you detach the back legs, always find somewhere clean to put the hams.
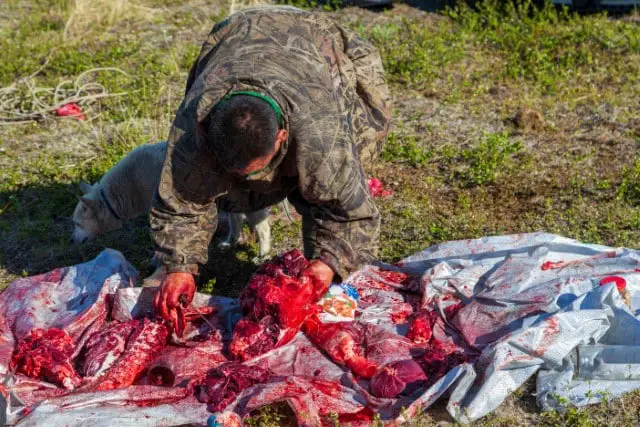
7. Have ice on hand so that you can immediately cool the quarters.
Use a knife made for fileting, and use it to bone out areas such as the flanks, rib meat, and so on.
Can You Skin a Deer on the Ground?
It’s better to hang your deer from a gambrel before skinning and quartering it. If you need to process it on the ground, though, you can.
But you must cover the ground first (for example, with cheesecloth bags). This will stop any dirt from contaminating the meat.
You can do this by preparing the ground with cheesecloth bags. Cover the ground before beginning the skinning process.
What Should You Do After Quartering a Deer?
After you’ve field dressed and quartered your deer, you should immediately transport it to a meat processor. Decide on which meat processer you will bring the deer to before you even go hunting.
This is important because you don’t want to risk your deer carcass getting compromised by delay.
Decide on how you will transport the deer to the processing plant. If you’re using a pickup truck, ensure there isn’t any dirt or sources of contamination in the bed that could compromise the meat.
Be Careful in Warm Weather
The urgency of getting your deer fully field dressed and brought to the meat processors is even more important when the weather is warm or hot.

That is because bacteria in the meat will proliferate much more quickly during high temperatures.
Be especially mindful to use correct field dressing and quartering methods, keeping the meat clean the entire time. Immediately transport the meat to a processing facility without delay.
What do I do if my knife gets dull while quartering the deer?
Always have a knife sharpener in your field dressing kit. If your knife becomes dull during quartering, take a moment to sharpen it. A sharp knife is safer and more efficient.
How do I deal with a deer that’s larger than what I’m used to?
For larger deer, you may need additional help to manage the weight during the quartering process. Use a stronger or larger gambrel and consider using a winch system for lifting. Adjust your cuts to accommodate the larger size, especially when removing the hams and shoulders.
Is there a way to make the quartering process easier if I’m working alone?
Working alone can be challenging. Consider using a portable hoist or gambrel system that allows you to adjust the height as you work. Take your time and focus on one section at a time to maintain control.
What should I do if I accidentally puncture the stomach or intestines during field dressing?
If this happens, clean the area immediately to prevent contamination. Use water and a clean cloth to wipe away any spillage. Be extra cautious when making cuts near the abdomen.
How can I ensure I’m making the correct cuts when quartering?
Familiarize yourself with deer anatomy before the hunt. During quartering, feel for bone structures as guides, and always cut joints at their natural separation points. If unsure, consult a guide or instructional video.
What’s the best way to transport the quartered deer from the field?
Use game bags to protect the meat from dirt and insects. Keep the meat cool, ideally on ice, especially in warm weather. Ensure the transport vehicle is clean and free from contaminants.
How do I prevent bacterial growth on the meat?
Cool the meat as quickly as possible. Use ice packs or a cooler if you’re far from a processing facility. Avoid leaving the meat in warm conditions for an extended period.
Can I quarter a deer if I don’t have all the recommended tools?
While it’s possible, it’s not recommended. Lack of proper tools can make the process more difficult and may compromise the quality and safety of the meat. Always try to have the essential tools before attempting to quarter a deer.
How do I dispose of the deer remains after quartering?
Dispose of remains responsibly. Check local regulations for proper disposal methods. Some areas have designated disposal sites for hunting waste.
Final Thoughts On How to Quarter a Deer
The most important venison cuts you will have after quartering include:
- two tenderloins
- two neck meat slabs
- two backstraps
- two hams
- two shoulders
As we’ve seen here, deer quartering is an important process if you want to make full use of all the venison harvested from your deer.
Quartering your deer carcass after field dressing will split the meat into smaller pieces that are much easier to store than a non-quartered carcass.